

In today’s competitive market, the box your product arrives in can be as important as the product itself. Custom packaging offers several game-changing benefits:
-
First Impressions & Brand Image: Your packaging is often the first physical touchpoint with a customer. A well-designed custom box signals quality and professionalism, whereas a plain brown box is a missed branding opportunity. Studies show 72% of consumers are influenced by packaging design when making purchase decisions. That means your box can literally help sell your product. A memorable unboxing can delight customers and set you apart from competitors (think of the excitement of unboxing an iPhone – the packaging plays a part in that perceived value).
-
Enhanced Customer Experience (Unboxing): The term “unboxing experience” has become a buzzword for a reason. Especially in the era of social media and YouTube, customers love aesthetically pleasing, enjoyable unboxing. 40% of consumers will share photos of unique or branded packaging on social media, giving you free word-of-mouth marketing. A custom box with a beautiful design, perhaps a thank-you note or a surprise inside, can create a wow factor that turns customers into repeat buyers and brand advocates.
-
Protection & Product Safety: Custom boxes are made to fit your product dimensions and often use appropriate materials or inserts, meaning your items are snug and secure. This reduces damage in transit. Instead of using an oversized box with void fill (which can let items rattle), a tailored box ensures better protection. Fewer damaged products mean fewer returns and happier customers. In essence, custom size = less movement = less breakage.
-
Cost Efficiency in Shipping & Materials: While custom boxes can be more expensive per unit than generic ones, they can save costs elsewhere. A right-sized box avoids excess dimensional weight in shipping (carriers charge by size as well as weight), potentially lowering shipping fees. It also cuts down on the need for extra packing filler (bubble wrap, etc.), which is both a cost and a waste issue. Moreover, by optimizing materials (e.g., using corrugated only when necessary, otherwise thinner carton for light products), you aren’t overpaying for more box than you need.
-
Differentiation and Professionalism: In saturated markets, every detail that differentiates your brand is crucial. Packaging is a canvas for storytelling – you can print your logo, brand colors, tagline, or even short narratives about your mission. This reinforces brand recall. Professional custom packaging shows you sweat the details, which increases perceived value. For example, a customer receiving a boutique candle in a custom printed box with elegant design will view the brand as more upscale than if it arrived in a plain mailer.
-
Customer Retention & Loyalty: Impressing a customer at delivery has been shown to increase the chance they’ll buy again. In fact, over half of online shoppers (52%) say they’re more likely to re-purchase from a company that delivers products in premium custom packaging. It’s not just about looking pretty – it builds trust that you care about the customer’s experience. That lingering positive impression can encourage loyalty and word-of-mouth referrals.
-
Tailored to Product Requirements: Certain products simply require custom packaging. If you have an oddly-shaped product or one with special needs (fragile glassware, perishable food, high-end electronics), off-the-shelf boxes won’t cut it. Custom packaging allows for specific add-ons like foam inserts, partitions, or coatings (e.g. moisture-resistant layers for food). Your product gets exactly what it needs in a packaging solution, no compromises.
-
Sustainability (if designed right): Custom packaging can be environmentally friendly. By sizing correctly, you reduce waste. You can also choose eco-friendly materials (recycled cardboard, biodegradable inks, minimal packaging designs). Many customers appreciate brands that are mindful of packaging waste. We’ll cover materials in section 4, but know that most custom boxes are recyclable and many are made from recycled content by default.
In summary, custom packaging is worth the investment for most brands because it’s not a mere box – it’s a marketing tool, a protective suit of armor for your product, and a key part of the customer experience. As one packaging expert put it, skimping on packaging might save a few pennies now but can cost you dollars in lost customers over time. If you want to prioritize product safety, brand perception, and customer satisfaction, custom boxes are a powerful asset.
(Educational CTA: If you’re wondering whether upgrading to custom packaging could really make a difference for your business, consider requesting a sample or prototype. Experiencing your product in a fully branded box first-hand can help you judge the impact – Mint Print Packaging offers sample kits so you can see and feel the quality before committing - EMAIL US to get in touch.)
2. Types of Custom Packaging Boxes – Choosing the
Right Style

Custom packaging is not one-size-fits-all. There are various types of boxes and styles available, each suited for different purposes. Below, we break down the most common custom box types you should know about, along with their typical uses, to help you choose the right style for your needs:
2.1 Corrugated Shipping Boxes
These are the classic cardboard shipping boxes used for mail orders and large shipments. They’re made of corrugated cardboard (with fluted layers for strength).
-
Ideal for: Heavy or fragile items, subscription boxes, or any shipment that needs durability. If your product is going through the mail or courier system, corrugated is usually the way to go.
-
Styles: Regular slotted cartons (RSC) which are the typical Amazon box style, half-slotted (open-top boxes), etc. They often come in standard shapes (rectangles) but can be custom-sized to your product.
-
Customization: Can be printed on (usually in one or two colors via flexographic printing, or more elaborate designs via digital print or litho-lamination). You can add your logo, shipping instructions, or eye-catching graphics. Inside printing is an option too, which is great for unboxing surprise (plain outside for theft deterrent, pretty inside for customer delight).
-
Strength Options: Single-wall vs double-wall corrugated. Double-wall has two fluted layers and is extra strong (used for heavy machinery, bulk shipments). For most e-commerce products, single-wall is sufficient. You’ll also hear about flute sizes (e.g., B flute, C flute) which affect thickness and cushioning; your supplier can guide which is best based on product weight.
Example Use: An electronics retailer shipping out a turntable would use a custom-sized corrugated box with foam inserts, ensuring the device arrives safely. The box might have the company branding and a warning icon for “Fragile” printed on it.
2.2 Mailer Boxes (Roll End Tuck Boxes)
Often referred to as mailer boxes or RETT boxes, these are the snazzy, often smaller boxes that don’t require tape to close – the lid “tucks” in. Think of the box that some subscription services use or the packaging for a pair of branded shoes or headphones.
-
Ideal for: Subscription boxes, PR kits, gifts, or retail products that are sold online and shipped (where presentation matters upon opening). They’re great for mid-sized items and kits.
-
Features: Mailer boxes usually have double sidewalls (making them sturdy) and a front flap that locks in. They present nicely (the unboxing is like opening a treasure chest).
-
Customization: Extremely brand-friendly. The entire exterior and interior can be printed with high-resolution graphics. Many brands get creative with inside-lid printing (e.g., a message like “Thank you” or artwork revealed when the customer opens it). They can be made from corrugated (e.g., E-flute which is thinner corrugation giving a smooth print surface) or cardstock for smaller ones.
-
Common Sizes: Often customized, but many subscription box services have standard sizes (for cost efficiency). If you’re doing a subscription box, you might choose a stock size to get better pricing, but design it uniquely.
Example Use: A monthly subscription box for gourmet snacks arrives in a custom mailer. Outside, it’s black with the company’s logo in glossy print; inside, it’s printed with vibrant illustrations of ingredients. No tape needed – the customer just opens the flap and digs in.
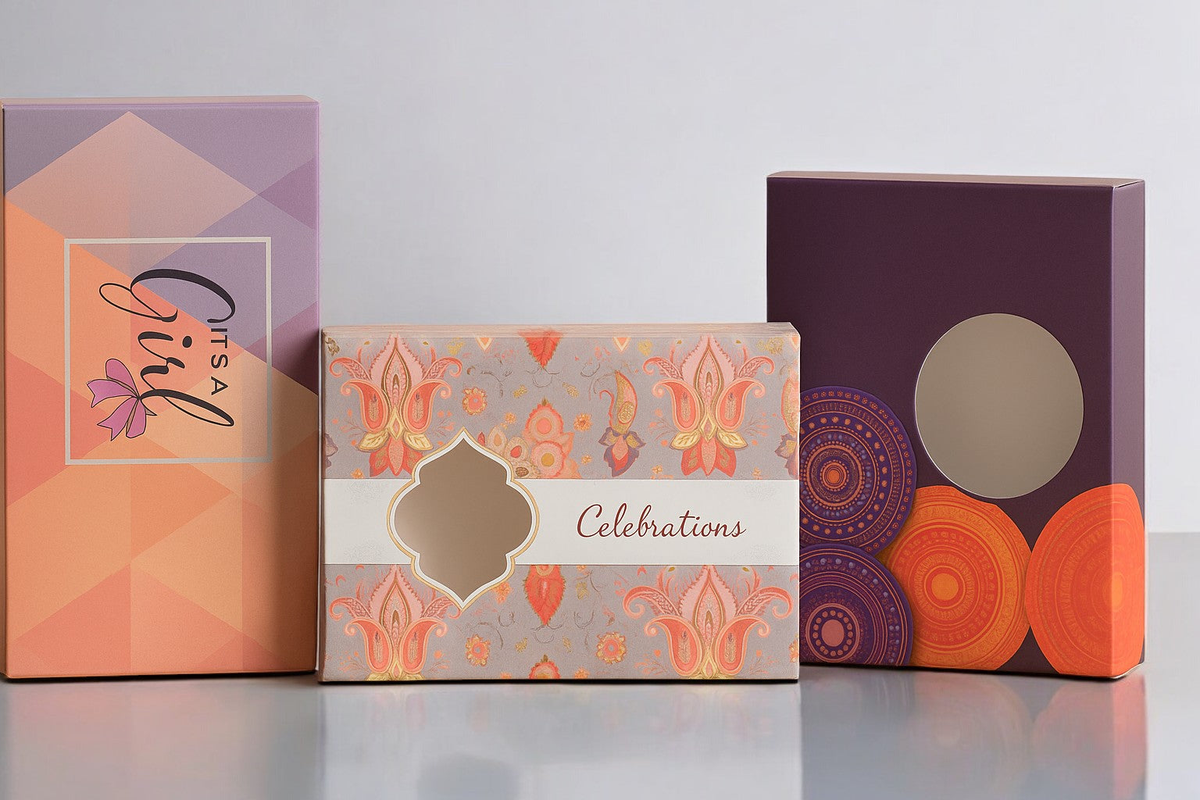
2.3 Folding Carton (Product Boxes)
These are the lightweight cardstock boxes you commonly see on retail shelves – for example, the box for an iPhone or a perfume bottle (though luxury ones also use rigid boxes, covered next). They’re made of paperboard (also called SBS – Solid Bleached Sulfate – if white and high quality) and are usually for lighter items.
-
Ideal for: Retail products like cosmetics, electronics, food items (cereal boxes are folding cartons), pharmaceuticals, etc. Any product that will have packaging as part of its marketing on a store shelf often uses folding cartons. Also used as outer packaging for items already in a container (e.g., a tube of lotion in a printed carton for branding).
-
Styles: There are tons – straight tuck end (STE), reverse tuck end (RTE), crash bottom (auto-lock bottom for heavier content support), sleeve boxes (open ends), pillow boxes (for small gifts or favors). Folding cartons are very versatile in shape and style.
-
Customization: Full-color printing, special coatings (glossy, matte, soft-touch), embossing, foil stamping – this is where you can go all-out to achieve a premium look. Because they are paperboard, the print quality can be very high (like magazine-quality images). They’re delivered flat and you fold them into shape when packaging the product.
-
Strength: Not as rugged as corrugated; these are not for shipping without an outer mailer. Often, companies will put a folding carton inside a corrugated shipper if selling online. But for retail, the folding carton itself is what sits on the shelf.
Example Use: A cosmetics company sells a face cream in a jar. The jar is put inside a custom folding carton that has beautiful artwork and foil-stamped logo, with information printed on the sides. The carton makes the product look high-end and provides space for ingredients and branding. When shipping to customers, the company might put this carton into a padded mailer or a small shipping box for protection.
2.4 Rigid Setup Boxes (Luxury Boxes)
Rigid boxes are the sturdy, non-collapsible boxes often associated with luxury products (also known as setup boxes). Think of the box that holds an iPhone or a high-end watch – usually thick, and the box and lid are separate pieces.
-
Ideal for: High-end items where perceived value is important: electronics, jewelry, luxury cosmetics, corporate gift boxes, influencer kits, etc. Also common for board games and puzzles.
-
Construction: Made from thick chipboard (a type of paperboard that’s much thicker than folding carton) that’s die-cut and then typically wrapped with printed paper or fabric. Because they don’t fold flat, they come pre-assembled (“set up”) – hence setup boxes. They are very sturdy and often reusable (people tend to keep nice rigid boxes).
-
Customization: Usually wrapped with printed paper which can have any design. Often have premium touches: satin ribbons, magnetic closures (like magnetic flap boxes), or cut-out compartments inside. You can do embossing, foil, etc., on the outer wrap. Interiors can have inserts (like foam or satin for jewelry).
-
Variations: Two-piece rigid boxes (base and lift-off lid), magnetic closure rigid boxes (one-piece that folds closed with magnets), drawer style rigid boxes (like a matchbox slide-out). These scream luxury and solid quality when you handle them.
Example Use: A new smartphone is packaged in a custom rigid box. The base is sturdy, the lid fits snugly with a subtle suction sound when lifted (that luxurious slow reveal). The box is covered in a sleek black paper with the logo embossed. Inside, there’s a precise cut-out where the phone sits, and a compartment for accessories. This kind of packaging assures the customer they bought something premium.
2.5 Custom Printed Shipping Envelopes and Mailers
(Not exactly a “box,” but worth mentioning in packaging types.) These include padded mailers, poly mailers, and rigid envelopes that can be custom printed. While boxes are great, sometimes your product is slim or soft (like clothing) and doesn’t need a box.
-
Ideal for: Apparel, documents, books, small accessories – items that can ship flat or don’t require a box. E-commerce brands often use poly mailers for clothing to save on shipping weight and cost.
-
Types: Kraft bubble mailers (paper envelopes with bubble lining), Poly mailer bags (plastic, no padding, just for soft goods), Rigid document mailers (like flat cardboard envelopes for art prints).
-
Customization: You can print logos or designs on these mailers. Poly mailers can have full-bleed graphics. It’s a way to still have branding even if you’re not using a box. They often have self-seal strips for easy closure.
-
Consideration: These offer less protection than a box, so only use when appropriate. Also, poly mailers are not as eco-friendly unless you use recycled content ones. Many brands now opt for compostable poly mailers (made from corn starch, etc.).
Example Use: A t-shirt company ships orders in a custom poly mailer bag. The bag is bright blue with the brand name and a fun slogan printed on it. It stands out in the customer’s mailbox and is waterproof. The shirt inside is already in a protective plastic, so a box wasn’t needed.
2.6 Specialized Custom Boxes
Depending on your needs, there are many other specialized box types:
-
Display Boxes: Boxes that turn into a display for retail (common in point-of-purchase displays, e.g., a countertop display box that holds smaller items and has a header card when opened).
-
Drawer Boxes (Shell and Slide): A two-part box where an inner tray slides into an outer sleeve (used for upscale packaging or gift sets).
-
Tube Packaging: Round or cylindrical “boxes” (often for bottles, posters, or specialty foods like tea or whiskey bottles).
-
Custom Inserts & Partitions: While not a box style themselves, you might have a box with a custom insert (foam, molded pulp, cardboard dividers) to organize and protect components inside. It’s part of custom packaging design if your product has multiple pieces.
Choosing the Right Type: Consider your product’s nature (fragile, heavy, lightweight, luxury?), how it’s sold (online shipping vs. store shelf vs. both), and your brand image. Often, you might use a combination: e.g., a high-end item in a rigid presentation box, which is then placed in a corrugated shipping box to send through mail. Or a product in a folding carton for retail, but you ship it in a cushioned mailer for e-commerce orders.
If you’re unsure, discuss with your packaging supplier or consultant – share your product details and goals, and they can recommend an optimal structure. At Mint Print Packaging, we often ask about your product dimensions, weight, fragility, and how you want the customer to perceive it, then guide you to the best box style (be it a simple mailer or a complex rigid setup). The right type of box will ensure you’re not overspending on unneeded features but also not skimping on protection or presentation where it counts.
(Tip: If possible, request samples of different box types. Feeling the difference between, say, a corrugated mailer vs. a folding carton can clarify what matches your vision. Many packaging providers will send samples of materials or styles – Mint Print Packaging, for example, can provide a sample kit showcasing various paper stocks and finishes so you can make an informed choice.)
3. Industry-Specific Use Cases – Custom Packaging in Action

Different industries have unique requirements and creative ways they use custom packaging. Let’s explore how various sectors leverage custom boxes, which will also give you ideas relevant to your own business:
3.1 Food & Beverage
In the food industry, packaging must balance branding with safety:
-
Examples: Bakeries using bespoke sweet boxes for pastries, chocolatiers with custom chocolate boxes, tea companies using custom tea packaging, meal kits delivered in branded insulated boxes.
-
Special Needs: Food packaging often requires food-grade materials and sometimes special linings (e.g., wax coating for greasy foods, or insulated packaging for temperature-sensitive items). Vent holes might be needed for hot foods. Inks should be non-toxic. If the food is directly in the box (not pre-wrapped), the packaging must be safe for direct contact.
-
Branding: Food boxes are huge for brand story – think of cereal boxes covered in branding and info, or a takeout box with a restaurant’s logo and social media handles. For confections or sweets, a beautiful box adds perceived value (people gift fancy chocolates partly because the box looks gift-worthy).
-
Notable Trend: Eco-friendly food packaging is big. Brands are moving to recyclable or compostable boxes (like using kraft paperboard with minimal ink) to appeal to eco-conscious consumers.
Use Case: A bakery selling assorted cupcakes uses custom-designed cupcake boxes with inserts for each cupcake. The box has a little window on top to show off the treats and is printed with the bakery’s pastel-colored branding. It not only protects the cupcakes but makes them Instagram-ready. During holidays, they even have special edition prints (e.g., snowflakes for Christmas) which encourages seasonal sales.
3.2 Cosmetics & Beauty
Cosmetic packaging is all about luxury and aesthetics:
-
Examples: Custom printed boxes for makeup palettes, skincare sets in elegant rigid boxes, perfume in a die-cut foam insert inside a two-piece box.
-
Special Needs: Cosmetics are often small but high value, so packaging tends to be intricate. Many cosmetic boxes have additional flourishes like metallic foiling, embossing, and high-gloss finishes to convey luxury. Also, products like creams or serums might come in glass jars which need protective packaging to avoid breakage (custom cut inserts are common).
-
Branding: The beauty market is fiercely competitive, and a gorgeous box can sway consumers. Brands often align packaging with their branding (e.g., an all-natural brand using earthy kraft packaging vs. a glamorous brand using glossy black with gold foil).
-
Unboxing as part of product experience: Especially for high-end beauty, the unboxing is akin to unwrapping a present. Layered packaging is common (outer box, inner wraps, tissue, etc.). If you’re going for a premium feel, custom boxes for cosmetics should reflect that through quality print and material.
Use Case: An indie makeup brand launches an eyeshadow palette. It arrives in a custom folding carton with holographic foil lettering and a magnetic closure. Upon opening, the inside of the lid has a inspiring quote for the customer. The palette is cradled in a custom-cut insert. Customers share “unboxing videos” of the palette on social media because the packaging looks so stunning. The brand gains viral marketing, proving how packaging in beauty is part of the product appeal.
3.3 Electronics & Tech
Electronics require robust packaging and smart presentation:
-
Examples: Smartphone and gadget boxes (usually rigid setup boxes with precision inserts), custom shipping boxes for PCs or hardware, accessories like headphones in hanging tab boxes or sleek two-piece boxes.
-
Special Needs: Protection is critical due to the high value and fragility of many electronics. Custom foam inserts or molded pulp trays are often used to secure items and components (chargers, manuals) in place. Anti-static packaging might be needed for sensitive components. Additionally, the box should handle potential drops during transit (hence snug inserts and corrugated outers for heavy items).
-
Branding: Electronics brands use packaging to convey innovation and quality. Ever notice how Apple’s packaging is minimalist but screams premium? They use perfectly fitted rigid boxes, often all-white with subtle logos, focusing on the tactile experience. Tech packaging often includes features like pull tabs to lift the product out easily, or compartments that feel intuitive.
-
User Experience: Good packaging can also serve a functional UX purpose – for instance, a router might have a diagram printed inside the box lid showing how to set it up. Or use pull-out drawers for different components labeled clearly. Custom packaging can enhance the out-of-the-box experience by making setup easier or delighting the user with organized presentation.
Use Case: A startup releasing a new smart home device ships it in a custom rigid box. The exterior has a sleek design with the product image. Inside, the device sits in a perfectly cut foam insert. Underneath, in a separate compartment, lie the cables and manual, with icons printed in the cavity indicating what’s inside (so the user finds everything easily). The sturdy box protected the device from a rough journey (no cracked screens here), and the user feels like they bought a quality gadget right from the unboxing.
3.4 Apparel & Luxury Goods
Fashion and luxury brands often treat packaging as an extension of the product:
-
Examples: Clothing and shoes in custom shoe boxes or apparel mailers, luxury handbags in high-end rigid boxes (or in fabric dust bags placed inside boxes), watch boxes with cushion inserts, jewelry boxes with velvet lining.
-
Special Needs: Often, packaging needs to protect without harming delicate items (e.g., avoiding too tight a fit that could crush a hat or crease a dress). For luxury, presentation is paramount – you might have multiple layers (e.g., a purse in a dust bag, then in a rigid box, then in a shopping bag).
-
Branding: High-end brands keep their packaging on-brand with signature colors (Tiffany & Co.’s robin egg blue box is as iconic as the jewelry itself). Consistency and quality of packaging materials (thick board, high-quality paper wrap) are crucial to maintain that premium feel.
-
Customer Experience: In retail, a beautiful box can become a keepsake. Many customers keep nice shoe boxes or jewelry boxes. This further spreads brand visibility in a customer’s home. For e-commerce clothing brands, a trend has been using chic mailer boxes or poly mailers that make the “unwrapping” feel like a treat (some include scented tissue paper, etc., for a multi-sensory experience).
Use Case: A luxury boutique selling handmade scarves uses custom rigid boxes for online orders. Each scarf is gently folded in tissue and placed in a rigid two-piece box with the brand’s logo in silver foil on top. The box is then placed in an outer shipping box with padding. When the customer opens it, it feels like receiving an upscale gift. They’re likely to keep the rigid box for storage, continually reminding them of the brand.
3.5 Subscription Boxes & E-commerce
This isn’t one industry per se, but it’s a model – subscription services and online retail rely heavily on custom packaging:
-
Examples: Monthly subscription boxes for anything (snacks, books, beauty samples, pet toys) that arrive in themed custom mailer boxes. E-commerce brands sending products directly to consumers use custom shipping boxes or mailers as a marketing channel.
-
Special Needs: Subscription boxes have to be exciting (to reduce churn – the more the box delights, the more likely subscribers stay on). They often include changing designs or fun slogans on packaging to surprise recurring customers. Also, efficiency matters: these companies might be packing thousands of boxes, so designs should also consider ease of assembly and packing.
-
Branding & Community: Many subscription brands encourage customers to share unboxing experiences. Printing social media handles or hashtags on the box (“Share your unboxing: #MySubscription”) is common. The packaging thus doubles as a community-building tool.
-
Variety: Because the contents change often, sometimes the packaging design changes seasonally or with each box. Some go eco-friendly, encouraging subscribers to recycle or return the box (or they make the box reversible – printed inside-out with a new pattern so customers can flip and reuse).
Use Case: A book subscription service sends a monthly box. Each month, the graphics on the box change to match the theme of the book selection (mystery, adventure, etc.). One month, subscribers open their mailbox to find a box with jungle illustrations hinting at what’s inside. The custom size fits a book and some goodies perfectly. The inside flap says “Enjoy your literary adventure!” It’s not just a delivery, it’s an experience that keeps subscribers looking forward to the next one, thereby increasing loyalty.
3.6 Manufacturing & Bulk B2B
On the B2B side (e.g., supplying parts or bulk products to businesses), custom packaging can mean optimizing for logistics and identification:
-
Examples: A company shipping machine parts worldwide might use custom printed shipping cartons with specific labeling (like part numbers or handling instructions) to make it easy for the receiving warehouse. Bulk packaging of pharmaceuticals with custom dividers to separate vials.
-
Special Needs: Emphasis on strength and information. Boxes might need to meet certain regulations (like UN certified boxes for hazardous materials). Custom printing might be more utilitarian (like large text or barcodes on the box) rather than aesthetic, but it’s still “custom” to the business’s needs.
-
Branding: Less about flashy design, more about consistent logos and ensuring the packaging represents the company in transit. For instance, a supplier might want their logo on all outgoing cartons for easy identification by clients. Also shows professionalism.
-
Efficiency: B2B packaging might incorporate features like being sized to pallet dimensions, easy-open tear strips for quick unboxing in factories, etc. Customization here is about making the packaging process and the end-user’s process smoother.
Use Case: An automotive parts supplier ships brake kits to dealerships. They use custom-sized corrugated boxes that exactly fit a kit, eliminating void fill. Each box is printed with the part number and the supplier’s logo and has arrows indicating orientation (“This side up”). When the dealership receives it, they instantly know what’s inside without extra labeling, and they trust the contents because of the professional presentation. Also, the snug box means the heavy parts didn’t shift and damage the box – everything arrives intact, saving money on returns.
As seen, each industry leverages custom packaging differently. The key is to identify what matters most for yours: Is it the flashiness and luxury (cosmetics)? The informative and safety aspects (electronics, B2B)? The fun and engagement (subscriptions)? Or a mix?
Mint Print Packaging has experience across many of these sectors (from bespoke sweet boxes for confections to custom cartons for apparel). By understanding your industry’s nuances, we help tailor the box solution accordingly. For example, we know a food box might need a leak-resistant liner or that a cosmetics box should have that premium touch. Use the above use-cases as inspiration and guidance for what you might request or focus on when designing your custom packaging.
(Pro tip: When planning your packaging, list out any industry-specific requirements or customer expectations. Then communicate those to your supplier. If you’re in an industry like food or pharma, ensure the supplier knows any compliance standards needed. If you’re in e-commerce fashion, tell them you want an Instagram-worthy unboxing. A good packaging partner will incorporate those needs into the design process.)
4. Materials & Finishes Comparison – Options for Custom Boxes
One of the most important aspects of custom packaging is choosing the right material and finish. These affect not only how your box looks, but also its durability, cost, and eco-friendliness. Below we’ll compare common materials used for custom boxes and the finishes you can apply to them, often summarizing in tables for clarity.
4.1 Common Packaging Materials
| Material | Description & Use Cases | Pros | Cons |
|---|---|---|---|
| Corrugated Cardboard (Corrugate) | A fluted sheet sandwiched between liners. Comes in various flute thicknesses (e.g., A, B, C, E flute). Used for shipping boxes, mailers, any box needing strength. | – High strength-to-weight ratio (good protection) – Can handle heavy weight – Recyclable & often made of recycled fibers – Good for shipping and larger boxes |
– Surface is not as smooth for printing (visible flute texture if not using a coated liner) – Bulkier storage (doesn’t fold flat as compactly as paperboard) – Typically brown or white; colored print can appear less vibrant without coating |
| Paperboard (Folding Carton) (e.g., SBS – solid bleached sulfate) | A single-layer board, typically 14-24 pt thickness for product cartons. Used for retail packaging (cereal boxes, cosmetics, etc.) that aren’t meant to hold very heavy items. | – Smooth surface excellent for high-quality printing – Can be easily die-cut into creative shapes – Folds flat (efficient for shipping/storage before assembly) – Light weight (keeps shipping costs low) |
– Not as sturdy for heavy or large items – Requires additional protection for shipping (prone to crushing if not handled carefully) – Less cushioning (no fluted layer) |
| Rigid Box Material (Chipboard + wrap) | Very thick paperboard (chipboard) typically 40-60 pt, used as the core for rigid setup boxes. Covered with printed paper or fabric. Common for luxury packaging. | – Extremely sturdy and durable (high-end feel) – No visible seams (paper wrap covers edges) – Can support premium features (magnets, ribbon pulls) – Great reusability (often kept by customers) |
– Expensive compared to folding carton or corrugate – Does not ship flat (takes up more space in transit/storage) – Longer production (often hand-assembled for wrapping) |
| Kraft (Natural Brown) Material | This can be in corrugated or paperboard form; “kraft” denotes the natural brown, unbleached paper. Many use it for a rustic or eco-friendly look. | – Eco-friendly appearance; often recycled – Sturdy (unbleached fibers are longer, adding strength) – Cost-effective sometimes (less processing of paper) – Trendy for organic, artisanal brands |
– Limited printing vibrancy (brown background dulls colors) – Not suitable for luxury look (can be seen as less premium, depending on design) – If not coated, not moisture-resistant (could show oil stains from products) |
| Specialty Materials (Plastics, Metal, etc.) | E.g., clear plastic boxes (PVC or PET boxes for retail, often used to show product), or tin boxes (for mints, cosmetics). These are less common but used for specific aesthetics. | – Unique look (clear boxes showcase product, metal tins are sturdy and reusable) – For plastic: can be moisture-resistant; for metal: very durable and premium for certain foods/candles etc. |
– Often not eco-friendly (especially plastics) – More expensive (metal tins notably cost more per unit) – Limited printing (plastic requires special printing techniques or labeling) |
Most custom packaging for boxes will revolve around paper-based materials (corrugate, paperboard, rigid chipboard) because they are versatile and eco-friendly. Corrugated vs. Paperboard is a key decision: if you need strength, go corrugated; if you need sleek print and the box isn’t bearing much weight, folding carton might suffice. Sometimes the two are combined (e.g., a litho-laminated corrugated box uses a printed paper label mounted on corrugate – giving you strength plus a pretty print).
Eco Tip: All the paper materials above are recyclable. Corrugated cardboard is widely recycled (over two-thirds of paper/cardboard in the US is recycled). If sustainability is a priority, opt for materials with high recycled content and avoid unnecessary plastic coatings.
4.2 Printing Methods & Quality
Different printing methods pair with different materials:
-
Digital Printing: Best for lower quantities or highly detailed, multi-color artwork. No printing plates needed. It’s like a giant high-quality inkjet printer for boxes. Good for short runs or prototypes.
-
Flexographic Printing: Common for corrugated boxes, especially simple graphics or large runs. Uses printing plates. It’s cost-effective at scale but not ideal for complex images (color limitations, and slight quality difference).
-
Lithographic (Offset) Printing: Used for the highest quality prints. Often, print is done on paper which is then laminated to the box (like those glossy corrugated mailer boxes with perfect imagery). Great for vibrant, photo-quality results, but usually has higher setup cost (printing plates, etc.). Economical only at higher volumes unless using digital-litho hybrid.
-
Screen Printing: Sometimes used for simple logos or specialty inks (e.g., printing white ink on a black box where other methods might not show up well). Good for bold solid colors on small runs (like a short-run corrugated mailer).
-
Foil Stamping, Embossing, Spot UV: These aren’t printing methods per se, but finishing processes applied often after printing to add special effects (discussed below).
Your supplier will typically choose the printing method based on your design, material, and quantity. For example, Mint Print Packaging might use digital printing for a 50-box order with full-color artwork (to avoid plate costs), but flexographic for a 10,000-box order with a 2-color logo (for cost efficiency). We ensure whichever method, the result fits your quality expectations.
4.3 Finishes and Coatings
Once printed, the packaging can have various finishes:
-
Gloss Lamination: A thin film laminated onto the surface giving a shiny look. It enhances vibrancy of colors and adds protection (smudge-resistant, little water resistance). Great for a sleek, polished feel.
-
Matte Lamination: A film that gives a non-glossy, muted effect. Lends an elegant, upscale look (common for luxury brand packaging). Also protective. Some prefer it because it doesn’t show fingerprints like gloss can.
-
Soft-Touch Lamination: A special matte lamination that feels velvety or “soft” to the touch. Very premium – often used in high-end cosmetics or electronics packaging. It’s all about tactile experience.
-
Aqueous Coating: A water-based coating applied like ink on press. It can be in gloss, satin, or matte. It’s environmentally friendlier than lamination films and adds a light protection and sheen. Most folding cartons have some coating to seal the ink.
-
UV Coating: A thicker coating cured by UV light. Can be high-gloss and very slick. Often used for spot application (see Spot UV below). It’s more plasticky feel, but very shiny if that’s desired.
-
Varnish: Similar to aqueous but can be applied in select areas too. It’s a lighter effect, typically used to just protect the print or give a subtle gloss.
-
No Coating (Raw): Some go with uncoated for a natural feel (common with kraft, to keep it eco-look). The print colors will be flatter and less protected, but it has a distinct texture.
4.4 Special Effects
-
Spot UV: Applying UV coating only on specific spots of the design (e.g., just on the logo or a pattern). It creates a contrast – imagine a matte box with just the logo glossy. When light hits, that logo shines, literally. It’s a popular way to add subtle premium flair.
-
Foil Stamping: A layer of metallic foil (gold, silver, rose gold, holographic, etc.) is stamped with heat onto the surface in desired shapes (often logos or accents). It gives a reflective, shiny metal look that printing ink cannot replicate. Luxury and celebration brands love this (think of a gold-foil logo on a black box).
-
Embossing/Debossing: This is about texture – embossing raises certain elements of the design (so you can feel it protruding), debossing presses it inwards. It’s often used on logos or patterns to add a tactile 3D element. On its own it’s colorless (just shaping the paper), but it can be combined with printing or foil (e.g., an embossed, foil-stamped logo – you feel it and see it).
-
Window Patching: For certain boxes (like food or cosmetics), you might add a window – a die-cut hole in the cardboard with a clear plastic film patch so customers can see the product. E.g., a bakery box with a window to show the treats.
-
Inside Printing: Don’t forget, you can print on the interior too! It’s a bit extra cost but can hugely elevate unboxing. Many subscription boxes print fun designs or messages inside.
Comparing Finishes – Quick Table:
| Finish | Look & Feel | When to Use | Cost Impact |
|---|---|---|---|
| Gloss Lamination | Shiny, vibrant, slick | Retail impact, colorful designs, when you want pop | Moderate (lamination adds cost per unit) |
| Matte Lamination | Dull (non-reflective), smooth | Luxury or sophisticated vibe, soft colors/designs | Moderate (similar to gloss) |
| Soft-Touch Lam. | Matte + velvety feel | High-end tech, cosmetics; when tactile luxury is desired | Higher (premium cost) |
| Aqueous Coating | Light gloss or satin (subtle) | Standard for most packaging as default protection | Low (usually standard inclusion) |
| Spot UV | Mixed glossy highlight on matte base | To accent logos or patterns subtly | Moderate (setup cost but per unit low) |
| Foil Stamping | Metallic shine on elements | Luxury, gift, to signify premium or celebratory | Higher (each foil area adds cost) |
| Emboss/Deboss | 3D texture differences | Premium branding, subtle elegance | Higher (requires dies and setup) |
| None (Uncoated) | Raw paper feel, muted print | Eco-friendly look, artisanal vibe | None (could even be cheaper) |
Choosing the Right Combination:
It often comes down to your brand personality and budget. For example:
-
If you are a premium tech brand, you might pick a matte black soft-touch lamination with a spot UV glossy logo – giving a modern, sleek, yet understated luxury feel.
-
If you are an organic handmade soap brand, you might go with uncoated kraft material and simple one-color print – to feel earthy and eco-conscious (and cost-effective).
-
A subscription box for kids might be glossy and vibrant to excite, possibly with a UV coating to make colors pop and be a bit more resistant to handling.
-
A wedding gift box company might use ivory paper, matte finish, with gold foil embossing – very elegant and gift-worthy.
Also consider practicality: High gloss shows scratches more, matte can scuff but not as visibly. Soft-touch feels great but can show fingerprints on dark colors a bit (some have special anti-fingerprint). Foil and embossing involve extra manufacturing steps (slightly longer lead times maybe). If your timeline or budget is tight, sometimes simpler is wiser.
Mint Print Packaging typically consults on these choices by showing you samples. Seeing and touching a sample with, say, spot UV vs foil can help you decide which effect you love. We also keep in mind your artwork: e.g., large areas of dark solid color often benefit from lamination to avoid cracking on folds; intricate colorful artwork might lean towards digital printing with a coating; a minimalist design might shine (pun intended) with one big foil element.
(In summary,) materials and finishes are the tools to make your custom box not just a container, but a true reflection of your brand. By comparing your options as above, you can mix and match to get the desired look, durability, and cost balance. Don’t hesitate to ask your packaging provider for suggestions or samples – it’s much easier to decide with a physical swatch book in hand or photos of past projects.
5. MOQ and Lead Time – Understanding Production Constraints
When planning for custom packaging, two crucial logistical factors come into play: Minimum Order Quantity (MOQ) and lead time. Let’s break down what you need to know about each and how to navigate them:
5.1 Minimum Order Quantity (MOQ)
What is MOQ?
MOQ is the smallest number of units a supplier is willing to produce in one run. For example, an MOQ of 5000 means you must order at least 5000 boxes in that custom design/size.
Why do MOQs exist?
There are fixed costs in making custom boxes – setting up print plates or dies, machine setup time, etc. To make it financially viable, printers prefer larger runs. Making 10 boxes might cost almost the same as making 100 in terms of setup, thus they set a minimum. Additionally, material may be ordered in bulk sheets; running very small batches is inefficient and wasteful.
Typical MOQs:
-
Digital Print vendors : Mint Print Packaging’s own policy, for instance, is a minimum of 2500 for certain lines like designer sweet boxes and 5000 for other bespoke packaging.
-
Offset/Flexo printing usually have higher MOQs (often 2000, 5000 or more), because those setups have upfront plate costs.
-
Rigid boxes often have higher MOQs (maybe 2500 or 5000+) due to complex assembly.
How to deal with MOQs if you’re a small business?
-
Negotiate or ask for options: Some manufacturers can do a smaller trial run if you agree that subsequent orders will be larger, or they might have an in-house digital print line for prototypes.
-
Short-run specialists: Seek out companies that specialize in short runs, possibly using digital presses. They might be slightly more expensive per unit, but you won’t need to order far more than you need.
-
Stock & Customize approach: If MOQs are daunting, one strategy is to use a stock box that’s close to your size and add custom labels or sleeves to brand it. This way you can start small and then move to fully custom when volume grows.
-
Pooled production: Some packaging providers batch multiple small orders on a larger print run (gang-run printing). For example, they might print your 100 boxes alongside other clients’ on the same sheet and then cut them separately. This lowers cost – ask if your supplier does something like this.
-
Plan for growth: If you must meet a 500 MOQ but only need 300 boxes now, consider ordering the 500 and using them over time as you grow (assuming the information on them won’t change). Non-perishable, won’t go bad. Just store them properly.
Beware of too low order pitfalls: Very small orders can sometimes mean compromises:
-
Per-unit price will be higher. For instance, 50 custom boxes might cost you more per box than 500 would. Weigh the cost vs. cash flow/storage concerns.
-
Options might be limited – maybe only digital printing (no fancy foil or custom pantone matches unless you hit a threshold).
-
If you’re almost at a price break (like 450 boxes vs the price drop at 500), sometimes it’s cost-effective to get the slightly higher number for a much better unit price.
(Real example:) Suppose 200 boxes cost $2 each = $400. But 500 boxes might cost $1.20 each = $600. If you can use 500 eventually, spending an extra $200 to more than double quantity could be wise to save per unit (and you won’t be scrambling to reorder soon).
5.2 Lead Time (Production and Delivery)
What is lead time?
Lead time is how long it takes from placing your order (with final artwork approved) to receiving the finished boxes. It includes manufacturing time and sometimes shipping time if produced abroad.
Typical Production Times:
-
Local/Domestic Production: Often 2–4 weeks for custom boxes once artwork is confirmed. Simpler products (plain corrugated with one-color print) might be faster (1-2 weeks if the plant isn’t busy), whereas complicated jobs (multi-process like foil + emboss) might take longer (4-6 weeks).
-
Overseas Production: If you order from overseas (commonly abroad for cost savings on large runs), production might also be a few weeks, but shipping adds time (sea freight can add 4-6 weeks). Air freight is faster (a week or less) but very expensive for bulky boxes.
-
Rush Orders: Some vendors offer rush service for a fee, cutting lead time significantly if they can prioritize your job or use faster methods.
Factors affecting lead time:
-
Order Volume: 100 boxes can be produced faster than 10,000 obviously. Large orders might need more machine time or multiple batches.
-
Production Method: Digital printing is quick to start (no plates), so small digital orders might turn around in days. Custom tooling (dies, foil stamps) adds time (need to create those tools).
-
Seasonality: Packaging industry has peak seasons. For example, late summer/fall ramp up for holiday season can extend lead times due to high demand. Plan ahead if you have a Christmas product launch – by October many factories are slammed.
-
Proofing and Approval: The clock starts after you approve everything. If you need a physical proof (a prototype sample) before full run, add time for that (~1 week for production and shipping of a prototype). It’s often wise to do, though, to catch errors.
Proactive planning:
-
Buffer Time: Always build in buffer. If your product launch is in June, don’t place a box order in late May expecting miracles. Aim to have packaging in hand at least a couple weeks before you need it, to account for any delays or re-dos.
-
Parallel Tasks: While boxes are being made, handle other prep like product manufacturing, so you’re not losing time. Coordinate so that you’re not waiting idle for packaging.
-
Split shipments: For overseas, one trick is to air freight a small portion (to get started) and sea freight the rest to save cost. E.g., air ship 200 boxes for immediate use, ocean ship 5,000 for the quarter’s supply.
Communication:
A good supplier will be transparent about lead times. At Mint Print Packaging, we inform clients upfront: e.g., “Production will take X weeks from art approval, plus transit. So your boxes should arrive by Y date.” We consistently deliver on time – something we pride ourselves on mintprintpackaging.com. If timing is critical, communicate that. We might adjust schedule or offer partial deliveries.
If you’re in a hurry:
-
Ask if the printer can do a partial expedited run (maybe digital) of a small quantity to tide you over.
-
See if they have any in-stock plain boxes you can brand with stickers as a stopgap.
-
Be ready to pay rush fees if absolutely necessary – sometimes overtime or expediting shipping is possible at extra cost.
Lead Time for Reorders:
Once everything is set up (dies made, etc.), reorders can be faster because prep work is done. But don’t assume – always check current lead times.
Storage considerations:
If MOQs forced you to order more boxes than you need for a month or two, ensure you store them properly. Dry, clean storage prevents any warping or dust accumulation. It’s better to have them ready than to run out and rush reprint.
(Summary of this section:) MOQ and lead time are constraints but can be managed with informed planning. If you’re a small business balking at MOQ, know you’re not alone – but also realize investing in a bit more inventory can pay off by lowering costs and ensuring you don’t stock out of packaging. For lead times, “start early” is the mantra. As soon as you have your product and branding ready, get the packaging process going. This guide’s aim is to demystify these aspects so you can schedule your projects realistically and avoid last-minute panics.
6. Cost Drivers of Custom Boxes – Pricing Factors and Optimization
One of the first questions businesses ask is, “How much do custom packaging boxes cost?” The answer: it varies – widely. Custom packaging is, well, custom. However, we can break down the key cost drivers that determine pricing, and provide tips on how to optimize for your budget.
6.1 Key Factors That Impact Cost
According to packaging experts, the price of a custom box is generally determined by a combination of factors like dimensions, box style, material, print coverage, finishes, and quantity. Let’s detail each:
-
Quantity (Order Volume): This is the biggest factor. Almost always, the more units you order, the cheaper the cost per unit. This is due to economies of scale: setup costs get amortized over more boxes, bulk material purchasing, longer production runs are more efficient. For example, 1000 boxes might cost only slightly more total than 500 boxes, but the per-box price could drop significantly. Most suppliers have price breakpoints at certain quantities (250, 500, 1000, 5000, etc.). If you can accurately forecast usage, order higher quantities in one go to save money per piece. Be mindful not to over-order far beyond what you can use/storage, but don’t order too conservatively either if a small bump in quantity yields big savings.
-
Size and Dimensions: Bigger boxes cost more because they use more material. Pricing often scales with the sheet area used. Depth can particularly increase cost in corrugated boxes (since a deeper box uses more material for flaps). Also, odd dimensions that don’t nest well on a standard sheet might waste material, indirectly costing more. Whenever possible, optimize your box dimensions to fit your product snugly and efficiently use standard sheet sizes (a packaging engineer can help with this Tetris puzzle to reduce scrap). Tiny boxes can be cheap per unit material-wise, but note that very small custom work can cost more than the tiny size implies if there are handling challenges. Conversely, very large boxes obviously use more board and may require double-wall corrugate which costs more.
-
Material & Board Grade: Premium materials (like a thick rigid box or specialty paper) will raise cost. Even in corrugated, there are grades – e.g., regular vs. heavy-duty corrugate, or white-coated vs. brown kraft (white often costs a bit more due to bleaching and coating). Recycled content vs virgin can also have cost differences depending on market (sometimes recycled is cheaper, sometimes not, if it requires more processing). If you’re budget-sensitive, talk to your supplier about material options: maybe a slightly thinner board that still works, or using kraft (brown) instead of bleached white if the aesthetic permits (brown is usually cheaper).
-
Printing (Colors and Coverage): How many colors and how much of the box is printed affects price. In traditional printing, each color might require a separate plate (in flexo or offset), so more colors = more setup cost. For example, a 1-color logo on one side is far cheaper than full-color, full-box pattern printing. In digital printing, you’re not charged per color, but extremely high coverage (ink all over) could up the cost due to ink usage. Special color matches (Pantone matching) or metallic inks can also cost more. Rule of thumb: If you need to cut cost, consider simpler designs (fewer colors, or maybe just printing on top and not all sides). But do note, your packaging is marketing – sometimes the extra spend on a beautiful design pays for itself in customer impact.
-
Finishes & Extras: Every fancy add-on – foil stamping, embossing, special coatings, custom inserts, etc. – adds cost. Some add both a fixed setup cost (e.g., a metal die for foil) and a per-unit cost (foil material + extra labor to stamp each). Evaluate which extras truly add value for you. For instance, if budget is tight, you might drop an emboss and stick to a print only, or replace foil with a metallic ink (not as shiny but cheaper). Inserts like foam will add cost; sometimes a cleverly folded cardboard insert can replace a foam at lower cost. If you have multiple extras in mind, ask for quotes with and without to see the difference – then prioritize. However, don’t strip away all elements that differentiate your brand – it’s a balance between cost and presentation.
-
Tooling Costs (One-time): Some costs are one-time (amortized in unit cost if quoted that way, or charged upfront). This includes cutting dies for the box shape, print plates for offset/flexo, foil dies, embossing dies. Usually, if you stick to the same design and reorder, you don’t pay those again. But if you frequently change design/size, you’ll incur new tooling. The first order of a custom size might seem pricey due to these setup costs. Ensure you understand from your supplier what portion of cost is setup vs variable – it helps explain why unit cost plummets with higher quantity. Many quotes bake it in, but you can ask. If a plate costs $200 and you only order 100 boxes, that’s effectively $2 per box just from the plate. Order 1000, it’s $0.20 per box – big difference.
-
Shipping & Logistics: Don’t forget the cost to get the boxes to you. If manufacturing is local, delivery might be a small truck fee or free at certain order sizes. If overseas, freight can significantly add to cost. The box’s volume (they’re lightweight but bulky) matters – shipping 1000 boxes can fill a pallet or more. For large orders, sea freight is cheapest but slower; air is fast but costly. Sometimes, producing with a slightly more expensive local supplier can be cheaper overall when you factor in freight/duties from an overseas one. Also, storing boxes has a cost (if you need to rent more warehouse space). So unit cost vs total landed cost – consider it. Mint Print Packaging being UK-based, for example, is advantageous for UK businesses to avoid long shipping times/costs from abroad.
6.2 Tips to Optimize Packaging Costs
Now that you know the factors, here’s how to get the most bang for your buck:
-
Right-Size Your Box: Dimension optimization is key. A box that’s even 1 inch larger than necessary in each dimension might use significantly more material area. Work with your supplier to determine the minimum internal size that safely fits your product. Removing even a small amount of unused space can cut material usage and also reduce shipping fees (some carriers charge by size). Also, try to keep dimensions to whole centimeters or inches that maximize how many blanks fit on a standard sheet – weird dimensions might cause wastage.
-
Simplify Your Design: If you’re on a tight budget, go for a clean, minimal design – maybe just your logo and website in one color on a kraft box. It can still look elegant and saves cost on printing. You can always fancy up the unboxing with inexpensive touches like a nice sticker or custom tape later. Save the multi-color all-sides print for when volume (and budget) grows. Many chic brands actually use very minimal packaging by design (think Muji’s aesthetic or Apple’s sparse design – not cheap, but minimal printing).
-
Order in Bulk (but smartly): As discussed, take advantage of price breaks. If you know you’ll use 1000 boxes in the next 6 months, it’s probably cheaper to order 1000 at once than two batches of 500 separated. But if cash flow or storage is an issue, see if the vendor can produce 1000 in one go for the discount but store some and ship to you as needed (some vendors offer this). Or consider a contract (commit to X over time for better per-unit pricing without taking all at once).
-
Standardize if Possible: If you have multiple products, see if you can use one box size for several of them rather than different sizes for each (if it doesn’t compromise too much). Combining orders for one larger run of a single design yields better pricing than splitting into many small runs of different designs. Alternatively, a slightly larger universal box with different inserts could serve multiple SKUs.
-
Avoid Last-Minute Changes: Mistakes or changes after production starts can be costly (you might have to re-do printing plates or junk some material). Triple-check your artwork and dimensions (order a sample proof if possible). A small typo or color error caught before mass production saves big money and headache.
-
Leverage Supplier Expertise: Good packaging providers will often propose cost-saving tweaks. For example, they might suggest a different closure style that doesn’t need an extra tape or glue line, or adjusting a height to fit more pieces per sheet. Be open about your budget, and ask “how can we achieve something close to this look cheaper?” Perhaps a less expensive coating that looks 90% as good, or an off-the-shelf insert instead of custom. They know their materials and machinery best.
-
Compare Quotes Wisely: It’s fine to shop around, but ensure apples-to-apples comparison. One supplier might quote a higher unit cost but includes shipping, better material, or extra services. Another might seem cheaper but has hidden costs (plate fee not included, etc.). Also factor the intangible: reliability, quality consistency. A cheap box is no good if it arrives late or poorly made causing product damage.
-
Consider Long-Term ROI: Don’t cut cost at the expense of product integrity or brand image too much. Sometimes paying a bit more for better packaging prevents expensive product returns (due to damage) or makes your brand look premium which allows you to charge more. There’s a balance between frugality and smart investment. Custom boxes do cost more than stock ones, but they can save money in other areas and increase sales by boosting brand value. (For instance, custom sizing saves void fill and shipping costs, as noted earlier, and great packaging encourages repeat sales).
In short, cost optimization in custom packaging is about finding the sweet spot where you achieve your desired outcome without unnecessary expense. By understanding the pricing levers – quantity, size, material, print, and finish – you can adjust those to suit your budget. Think of it like mixing a recipe: a little less of one ingredient, a little substitution of another, and you still get a delicious result at lower cost. We at Mint Print aim to be transparent about these factors so you can make informed decisions. A well-planned packaging strategy considers not just the upfront price, but the downstream benefits (customer impact, reduced product damage, etc.) which often justify the investment in custom packaging.
(Note: If you ever receive a quote that seems high, don’t be afraid to ask the supplier, “What can we change to reduce this cost?” They might offer alternative materials or suggest a volume for price break. Collaboration can often reveal savings that a straightforward quote doesn’t show.)
7. How to Choose the Right Packaging Supplier
Selecting a vendor for your custom boxes is as important as designing the box itself. A great supplier will be a partner in your business, ensuring you get quality packaging on time and within budget. Here are factors and tips to help you choose the right custom packaging supplier or manufacturer:
-
Quality and Consistency: First and foremost, examine the quality of their products. Request samples of boxes they’ve produced. Are the print colors vibrant and aligned correctly? Is the die-cut precise (no odd mis-cuts or rough edges)? Consistency is key if you reorder – you want the 2nd batch to be as good as the first. Look for a supplier with a track record of high quality control. Check reviews or ask for client references if available. A quick way to gauge quality: their own marketing materials or sample kit – if that is well-made, it’s a good sign.
-
Experience and Expertise: How long have they been in business and do they have experience with your type of packaging or industry? A supplier experienced in, say, food packaging will know about greaseproof coatings and FDA-compliant inks. One experienced in electronics will understand anti-static requirements or protective inserts. Look through their website or catalogue to see if they’ve done projects similar to yours. Mint Print Packaging, for instance, highlights expertise in sweet boxes and bespoke packaging – indicating we understand those niches well mintprintpackaging.com. An experienced supplier can also catch potential issues early and suggest improvements (e.g., “We recommend a slightly thicker board for this size box to avoid collapsing”).
-
Customer Service & Communication: This is huge. Are they responsive to inquiries? Do they patiently answer questions? Packaging can be complex for newcomers; you want a supplier who will guide you, not just take the order. As Mint Print’s philosophy says, “always be there to answer queries or any questions you have at any point” mintprintpackaging.com. You’ll likely iterate on designs or have concerns – choose a team that communicates clearly and promptly, whether it’s via email, phone, or a personal meeting. Good communication also means transparency about pricing, timelines, and any hiccups.
-
Design Support and Flexibility: Not every business has an in-house designer or packaging engineer. Does the supplier offer design services or at least technical assistance? For example, can they help create the dieline (the layout template for your box)? Will they review your artwork for technical issues (like ensuring bleed areas, resolution, etc.)? Some suppliers have in-house designers (Mint Print offers personalized design services for customers who need it mintprintpackaging.com). This can be invaluable if you’re not 100% confident on the design side. Additionally, a flexible supplier might accommodate small changes or custom requests more readily (like an unusual box style or adding an insert).
-
MOQ & Capability Alignment: Ensure the supplier can economically produce the quantity you need and has the capabilities for your design. If you need only 100 boxes and you approach a large-scale manufacturer whose typical MOQs are 10,000+, you might get turned away or not get much attention. Conversely, if you need 50,000 boxes monthly, ensure the supplier’s capacity can handle that scale reliably. Check what range of quantities they serve well. Mint Print, for example, can do short runs like 25 for certain products, which is great for small businesses mintprintpackaging.com, while still handling large orders – that versatility is a plus. Also check they can do the type of printing/finishing you want (if one supplier doesn’t do foil stamping in-house, they might outsource it, which could affect cost or lead time – know that upfront).
-
Pricing and Terms: While cost shouldn’t be the only factor, it’s obviously important. Compare pricing among those who meet your quality needs. But also consider payment terms (do they require full payment upfront? Deposit? Net 30 terms for businesses?). Some packaging companies require tooling fees separate from unit cost; make sure you understand the full pricing structure. Watch for any hidden costs (like file setup fees, storage fees if you don’t take delivery all at once, etc.). A good supplier is transparent about all charges. Sometimes a slightly higher price is worth it for better service or quality – the cheapest quote might skimp on material quality or service.
-
Reliability and Reviews: Delivery on time and keeping promises is critical – you don’t want your product launch delayed because your boxes didn’t arrive. Look for testimonials or case studies. Do they have repeat clients (a sign of reliability)? Online reviews can be telling. If a supplier has 10 glowing reviews talking about “fast and reliable” and one with much cheaper price has mixed reviews like “boxes arrived late” or “print was off-color,” weigh that carefully. As Mint Print highlights, “We keep to our promises. We consistently deliver on time.” and their positive Google Reviews confirm it mintprintpackaging.com. That kind of trust factor is invaluable.
-
Location and Logistics: A local supplier (in your country or region) can often deliver faster and with lower shipping cost. It may also be easier to communicate in real-time time zones and even visit their facility if needed. However, some overseas suppliers offer very competitive pricing for large runs, even after shipping. If you consider overseas, ensure they have experience exporting to your country (paperwork, customs, etc.) and get clarity on who bears shipping cost, customs duties, etc. Sometimes a domestic supplier is worth the slightly higher cost for peace of mind and speed (and supporting local economy, if that matters to you or your brand story).
-
Value-Added Services: Think beyond just printing. Some packaging providers will help with things like assembly (e.g., if you have a complex package that needs to be pre-assembled or kitted with an insert), warehousing (holding your inventory of boxes and shipping them to you as needed), or even fulfillment (packing your products into the boxes). If you’re a small team, having a partner who can do more than just print the box might streamline your operations. Even if you don’t need these from day one, it’s good to know if the potential for a deeper partnership is there as you grow.
-
Sustainability and Ethics: Increasingly, brands care about ethical sourcing. If it matters to you that materials are sustainably sourced (FSC-certified paper, for example) or that the supplier has eco-friendly practices (recycling waste, using soy-based inks), ask about it. Some suppliers specialize in sustainable packaging. Others might donate or have social initiatives. These may or may not influence your decision, but if you have a brand ethos around sustainability, aligning with a like-minded supplier can enhance credibility (plus they’ll proactively offer greener material choices to you).
-
Chemistry and Trust: Finally, sometimes it comes down to intangible fit. Do you feel comfortable with them? Are they treating your business (no matter how small) with respect? Packaging is usually an ongoing need, not one-and-done, so you want someone you can build a relationship with. If during initial conversations they are pushy, inattentive, or not listening to your needs, that’s a red flag. You want a supplier who acts like a partner – listens to your concerns, advises honestly (even if it means saying “you don’t actually need this expensive option, a simpler one will do”), and is invested in your success. A quick gauge: did they ask questions about your product and objectives, or did they just throw a generic quote at you? The former indicates they care about finding the right solution for you.
In summary, choosing a packaging supplier is about balancing practical factors (quality, cost, capabilities) with relationship factors (communication, trust). Do your due diligence: get quotes, ask questions, maybe start with a smaller order or prototype to test the waters. The right supplier will not only deliver boxes but also peace of mind. For example, many of our Mint Print clients choose us because we offer guidance, deliver reliably, and are competitively priced for the quality we provide mintprintpackaging.com. That combination fosters long-term partnerships. Aim to find your “Mint Print” – a packaging provider who checks all the important boxes (pun intended) for your business needs.
(Mini-CTA: If you’re currently searching for a packaging partner, consider reaching out to a reputable provider like Mint Print Packaging. Even if you just need advice or a comparison quote, a conversation can help you evaluate your options. The goal is to find a collaborator who will make the packaging aspect of your business a smooth and rewarding process.)
8. Common Mistakes to Avoid in Custom Packaging (Buyer Pitfalls)
Even with the best intentions, buyers (especially first-timers) can run into pitfalls when developing custom packaging. Here we outline some common mistakes and how to avoid them, so your packaging project can be a success rather than a stress:
Mistake 1: Not Prioritizing Structural Design
Focusing only on looks and neglecting the structural engineering of the box can lead to problems. A beautiful box is worthless if it’s hard to open or doesn’t protect the product. Example errors include boxes that are too small (product doesn’t fit or gets squished) or too large (product rattles around, risking damage). Some have odd structural choices that confuse the user – ever wrestled with packaging that wouldn’t open easily? That’s a design fail. Solution: Work closely on the dieline – get a physical sample to test fit and user experience. Ensure the structural design is intuitive and product-appropriate. If customers have to “wrestle” the packaging or it falls apart under weight, revisit your dimensions or box style.
Mistake 2: Choosing Generic Designs (Missing Branding Opportunity)
It can be a mistake to use a very plain or generic design when your goal was to stand out. Some businesses under-utilize their packaging real estate – they go with just a plain box (maybe for cost reasons) but in doing so, they miss the chance to impress customers. Generic or stock-looking packaging does nothing to differentiate your brand – it “looks like everyone else’s”. If a customer can’t tell your box apart from any random shipping box, that’s a lost branding moment. Solution: Even on a budget, try to include at least one distinctive brand element – a logo, a tagline, or brand colors. There are cost-effective ways: e.g., a single-color bold logo can be very impactful on a kraft box. Or use custom tape or stickers if printing on the box is limited. The key is to not fade into the background.
Mistake 3: Overdesigning and Neglecting Clarity
On the flip side, packing too much onto your packaging can be an issue. Overly busy artwork, too much text, or clashing colors can overwhelm or confuse customers. Remember that packaging needs to communicate key info quickly (what’s the product, brand, perhaps a key message). If there’s an information overload or the design is so “creative” that it becomes impractical (like hard-to-read fancy fonts), it can hurt user experience. Solution: Follow design best practices – maintain white space (blank space is good for highlighting important text or logos), use legible fonts (tiny or ornate text that customers can’t read is a no-go), and ensure contrast (dark text on light background or vice versa) for readability. You can be creative, but also think like a customer glancing at the box: do they quickly grasp what they need to?
Mistake 4: Spelling and Content Errors
It sounds obvious, but you’d be surprised how often people end up with a batch of printed boxes containing a typo, incorrect info, or outdated branding. Once printed, that’s an expensive mistake – you either use error-ridden boxes (which looks unprofessional) or scrap them (which is costly). Custom packaging is usually printed in bulk, so an error is multiplied hundreds of times. Solution: Proofread every word on your artwork. Get a second set of eyes to review it too. Check things like addresses, ingredients (if applicable), legal lines (™, ©, any required symbols), and even colors (ensure brand colors are correctly specified). Order an actual pre-production sample if possible to verify everything at scale – text that looked fine on screen might be too small on the real box, etc. This small delay to proof can save thousands of dollars and your brand’s image.
Mistake 5: Ignoring the Unboxing Flow (User Experience)
Sometimes a packaging design technically fits and looks good, but is frustrating for the end user. Examples: a box that’s very hard to open (ever broken a nail opening a sealed box because there was no thumb hole or instruction?), or one that opens such that contents spill out. Another is over-taping or over-gluing to where the customer almost destroys the product trying to get it out. Solution: Think through (and test) the unboxing process. Ideally, a customer should open the package in a logical, easy step or two. Incorporate features like tear strips on mailers (so they don’t need a knife), “Lift here” messaging if it’s not obvious, or inserts that hold items but also allow easy removal (a little ribbon under a product to pull it out of a tight insert, for instance). If you’re using lots of void fill or layers, make sure it’s not annoying (some filler is fine, but if a customer has to dig through excessive packaging peanuts, they might get a negative impression of wastefulness and hassle).
Mistake 6: Overlooking Protection (Under-packaging)
While some might over-package, the opposite mistake is under-packaging – not providing enough protection. This could mean using material that’s too thin, not including needed cushioning for fragile items, or a box style that isn’t sturdy enough (like using a folding carton when you should’ve used corrugate). The result: damaged products, which cost you returns, replacements, and a ding to your reputation. Solution: Identify any fragility in your product and err on the side of caution. If in doubt, use a stronger material or add protective inserts. A nicely designed box is great, but it must also get the product there safely. Also consider external factors: Will these boxes be shipped in a poly mailer or master carton, or will they be standalone in the mail? If the latter, make sure they can take a beating. Better to spend a few extra cents on a thicker box than lose a $50 product to breakage. Test drop a sample box with a dummy product from waist height a few times – see if it holds up.
Mistake 7: Being Inflexible on Specs (leading to delays or cost overruns)
Some buyers fixate on an idea (specific odd box size, or a very complex design) that either isn’t production-friendly or budget-friendly. For instance, insisting on an exact size that yields a lot of wasted paper, or a very intricate die-cut that the machine struggles with, causing delays or high reject rates. Or wanting numerous special finishes on a low quantity which skyrockets the per-unit cost. Solution: Be open to supplier recommendations. If they say “if we make it 5mm smaller it will save a lot of cost” or “maybe we simplify this aspect to meet your budget/timeline,” strongly consider it. They usually have reasons – either technical limitations or cost efficiencies. Flexibility can lead to a smoother process and sometimes you won’t even notice the difference in the end product, but your wallet and schedule will thank you.
Mistake 8: Last-Minute Rushing
We touched on timelines before. Rushing often leads to mistakes – either in artwork, not having time for a proof, or choosing a suboptimal supplier because they’re the only one who can meet a crazy deadline. It can also incur rush charges. Solution: Start the packaging process early. Give yourself buffer. That way you can calmly iterate on design, catch errors, and choose a supplier based on quality, not just speed. If you find yourself late, at least avoid rushing into printing without checking proofs – better a slight launch delay than 1000 unusable boxes.
Mistake 9: Not Aligning Packaging with Brand/Audience
Sometimes companies design packaging they personally like but that doesn’t resonate with their target audience or product positioning. E.g., using very playful, colorful packaging for a product meant for an executive audience that expects elegance. Or the opposite, a drab design for a fun children’s product. Solution: Keep your customer in mind always. Does this packaging speak to them? Does it reflect the product’s value? Also, consider retail if applicable – will it stand out on a shelf in the right way? The packaging should be a continuation of your branding from other channels (website, product, etc.).
Mistake 10: Forgetting Practical Details
This is a catch-all for small oversights. For example: not barcoding retail packages when needed (if selling in stores, a UPC code on the packaging is required; forgetting this is a big issue), or not including legally required info (like a company address for food products, or choking hazard warnings for toys). Another detail: not checking how the boxes will be packed for shipping to you – e.g., 500 large boxes might come on a pallet; are you ready to receive that? If you’re in a home office, 5 pallets of boxes could be a disaster on your driveway. Solution: Make a checklist of such details based on your industry. Look at similar products – what info is on their packaging that might be legally or industry required? Coordinate with your logistics: if you don’t have a loading dock and forklift, tell the supplier to send in smaller batches or via courier instead of freight pallet (maybe costlier but necessary).
By being aware of these common pitfalls – from design and structural issues to planning and legal considerations – you can avoid costly and brand-damaging mistakes. In packaging, a mistake isn’t just aesthetic; it can affect customer satisfaction, safety, and your bottom line.
Quick anecdote: One startup once printed hundreds of boxes with a misspelled brand name (an expensive reprint followed). Another used a box so flimsy that 30% of shipments had damaged goods – they saved a few cents on each box but lost tens of dollars per damaged product. These real-world stories underscore why each of the above points matters.
At Mint Print Packaging, we often guide clients through these issues (we’ll double-check artwork for obvious typos, advise if we think a certain size might need a thicker board, etc.) because we want you to succeed. It’s not just about selling you boxes; it’s about ensuring those boxes truly work for you mintprintpackaging.com. Avoiding mistakes is part of that value we try to add as a partner. Keep this checklist handy as you go through your custom packaging journey, and you’ll dodge many of the common landmines others have stepped on.
9. Expert FAQs – Your Custom Packaging Questions Answered
Over the years, businesses have a lot of questions about custom packaging. Below we’ve compiled 15+ frequently asked questions (and answers) that cover many of those lingering queries you might have. Think of this as a quick-reference FAQ by a packaging consultant:
Q1: Is custom packaging worth it for a small business?
A: It can be, yes. Custom packaging does have a higher upfront cost than plain boxes, but it can significantly elevate your brand perception and customer experience. If you sell premium or branded products, customers may expect a certain level of packaging. Moreover, protecting your products properly reduces losses from damage. One study found investing in quality packaging improves repeat purchase rates. That said, if you’re extremely tight on budget, you can start small (like custom stickers on blank boxes) and upgrade as you grow. But many small businesses find even a modest custom touch (like a logo on the box) is worth the extra cents for the marketing value it provides.
Q2: What is the typical Minimum Order Quantity (MOQ) for custom boxes?
A: It varies by supplier and box type. Many suppliers have an MOQ around 2500 units for fully custom orders mintprintpackaging.com, especially with offset or flexo printing. However, some offer lower MOQs: digital printing companies or certain providers may go 100 or even 50 units. For luxury rigid boxes, MOQs might be higher (sometimes 5000) due to complex setup. Mint Print Packaging, as an example, can do as low as 25 for some products (like specific sweet box lines) but generally 5000 for bespoke orders mintprintpackaging.com. Always ask, and if the MOQ is too high, shop around or consider short-run solutions. Keep in mind, even if MOQs seem high, you may use them faster than you think if business grows, and the per-unit cost will be lower at that MOQ than a micro-run.
Q3: How long does it take to produce custom packaging?
A: The lead time from approved design to finished product is typically around 2-4 weeks for domestic production on average. This can stretch to 6-8 weeks or more if you’re including shipping from overseas or if your order is very large or includes specialty finishes. Always check with your supplier; they’ll give a timeline. During peak seasons, it might be longer. Also account for time to finalize the design and proofing (which is in your control). To be safe, start the process at least 2 months before you absolutely need the packaging. If you need it faster, ask about rush options – some can expedite for an extra fee or might have a quicker digital print option.
Q4: Can I get a sample box made before full production?
A: Yes, most suppliers offer some form of prototyping or sample. There are a few types:
-
Digital mockup: a flat printed sample on same material, or even a 3D render – helps you see artwork placement.
-
Physical prototype: they’ll actually make one (or a few) boxes, either by digital print or sometimes hand-cutting using a plotter. This might be free or cost a fee, depending on the supplier and if you’re committed to an order.
-
Production sample: if time allows, some do a first article off the production line for approval before continuing the full run.
Mint Print, for instance, allows purchasing samples mintprintpackaging.com – which is great to ensure it meets your expectations. Always take advantage of samples if you can; it’s far cheaper to tweak after seeing a sample than after printing 5000 units.
Q5: Are custom boxes environmentally friendly?
A: They certainly can be. Most custom boxes are made of paperboard or corrugate, which are recyclable and often contain recycled content. Using right-sized packaging also reduces waste. To increase eco-friendliness, opt for:
-
Recycled materials (many corrugated boxes have at least 50-70% recycled fibers).
-
Water or soy-based inks (most modern printers use these).
-
Minimal coatings (some coatings can make recycling harder, though most aqueous coatings are fine).
-
Avoiding foam/plastic inserts in favor of paper-based inserts.
Also, if you brand your boxes well, customers may actually keep or reuse them (especially nice rigid or gift boxes), extending their life. Check if your supplier has sustainability certifications (like FSC for responsibly sourced paper). Custom packaging can also reduce environmental impact by reducing need for additional packing material (a custom snug fit means no excessive bubble wrap, etc.). So yes, done thoughtfully, custom boxes can be part of a sustainable approach.
Q6: What if I need only a very small number of boxes (like 10 or 20)?
A: Traditional custom printing might not be feasible for such a tiny quantity due to setup costs. But you have a few options:
-
Digital Print on Demand: Some services will digitally print even one box (though cost per box might be high, like paying £20 for one prototype, etc.).
-
DIY or Local Print Shop: If it’s a simple need (like a prototype or a few for an event), you can print labels or wraps to put on stock boxes yourself.
-
Laser cutting or Maker Labs: Makerspaces or local print shops sometimes offer laser cutting of packaging on chipboard – you could design something and have a few made this way.
However, if this is for consumers (like you’re selling only 20 units of a luxury product), consider increasing your price to cover a short-run cost or simply order the MOQs and use over time. Some packaging companies have a “minimum order value” rather than quantity – e.g., they’ll do 50 boxes if you pay a minimum cost. In summary, for ultra-low quantities, it’s challenging but possible through specialized short-run providers or clever hacks.
Q7: How do I design the artwork for a box?
A: Designing for 3D packaging is a bit different from flat paper. You’ll need a dieline template – this is a flat layout showing where the cuts and folds of your box are. Your supplier can provide this once box dimensions are decided. Then:
-
Use graphic design software (Adobe Illustrator is common) to place your artwork on the dieline. Ensure you extend colors/images to the bleed line (beyond cut lines) so there’s no unprinted edge due to cutting tolerances.
-
Keep critical text/logos within the safe area (away from edges and folds).
-
Mark clearly which panel is the front/back/top/bottom on the dieline so you orient designs correctly.
-
Mind the direction – e.g., text on a back panel might need to be upside down on the flat dieline so it reads correctly once folded. The dieline should indicate this, but double-check.
If you’re not comfortable, many packaging firms have designers who can do this for you (often for an added fee, or some include a basic layout service). Also, ask for a 3D digital proof if possible – some software can simulate the folding so you can see how your design wraps around.
Q8: What’s the difference between CMYK and Pantone (PMS) for printing?
A: CMYK is the standard 4-color process (Cyan, Magenta, Yellow, Black) used in digital and offset printing; it can produce a wide range of colors by mixing these. Pantone or PMS refers to pre-mixed specific ink colors used often in branding when exact color match is needed (like Coca-Cola’s red). In packaging:
-
If you have a specific brand color, you might want a Pantone ink to ensure consistency (especially across print batches or between different printers).
-
Pantone inks can also achieve colors that are hard in CMYK (like very bright oranges, or specific corporate blues).
-
However, using PMS might cost more since it means an extra ink/plate, whereas CMYK is default for full-color prints.
If exact color fidelity is crucial (and you’re not doing digital print), use Pantone for those key colors. For most photographic or multi-color designs, you’ll use CMYK. Many do a mix: e.g., CMYK for imagery, plus a Pantone spot for the logo color to nail it exactly.
Q9: Will the color on the box look exactly like on my screen?
A: Likely not exactly – computer screens use RGB light to display colors and can vary widely. Print uses CMYK/Pantone and the material’s color will influence it (printing on white vs brown kraft, for example, kraft will mute colors). Always expect some variation. That’s why hard copy proofs or at least physical samples of similar work are valuable to set expectations. Also calibrate: ask for a sample swatch of the material with a color print if possible. Keep in mind, even lighting under which you look at the box affects perception. If color fidelity is super important, work closely with the printer and consider proofing.
Q10: How sturdy will my custom box be? Can it hold X weight?
A: Sturdiness depends on material and construction:
-
Corrugated boxes have specifications (ECT or burst test ratings) that correlate to strength. Single-wall corrugate is usually fine up to maybe 10-20 kg depending on size, double-wall for heavier. If you tell your supplier the weight of contents, they’ll advise the right board grade.
-
Folding cartons (paperboard) are for light items; they won’t hold weight well on their own (think of a cereal box – fine for cereal, but you wouldn’t put a brick in it).
-
Rigid boxes are strong in a presentation sense but not meant for shipping weight unless also put in a shipper.
So, if you have something heavy, definitely choose corrugated of appropriate thickness. If the question is can someone stand on the box or will it crush in stacking – that’s again down to corrugate strength and if corners are properly supported. Suppliers often can provide a spec sheet; e.g., a common 32 ECT corrugate box can safely stack certain heights. When in doubt, request a sample and test it with your product (and maybe do a simple stack or drop test).
Q11: What if my box size changes slightly for a new version of the product – can I use the same design?
A: If the dimensions change, a new dieline is needed, so you’d have to adjust the artwork layout to fit. Minor changes (like 5mm taller) might not require a full redesign, just shifting elements. But a different size likely means different cutting die (new tooling). If you anticipate size changes, mention it to your supplier – maybe they can create a design that’s a bit adaptable. Unfortunately, you can’t just “stretch” a printed box; it’s physical. Another angle: if you plan ahead, design artwork that doesn’t rely on being at the absolute edges so it can adapt, or consider one larger size that fits both versions (if difference isn’t huge) to avoid having two separate inventories.
Q12: Can I use the same box design for shipping and for retail display?
A: You can, but there are trade-offs. A box optimized for shipping (durable, maybe some extra space for padding) might be a bit bulkier or less flashy than ideal for retail. Some companies do a double box: an inner pretty retail box, and an outer brown shipper for e-commerce. If you want a one-size-fits-all: ensure the design has necessary shipping labels/space if shipping directly (maybe a spot for an address label), and structurally it’s up to transit stress. It might not look pristine on a store shelf if it goes through mail scuffs. One solution is a branded shipping box that is also presentation – many subscription products do this. Or use a sleeve: a graphic sleeve over a sturdy plain box could be removed for retail (but that’s more cost). So, yes you can, but consider the context differences.
Q13: How do I handle multiple product variations? (e.g., 5 flavors of a product)
A: There are two approaches:
-
Unified design with variations indicated: e.g., same base design but a color change or a sticker for each flavor. This way you could print one big batch of a generic box and then differentiate by applying a label or having a blank spot to stamp flavor info. This is cost-effective if volume per variant is small.
-
Separate designs for each: which means separate print runs and likely higher cost per variant. If you have high volume of each variant, it’s fine and looks very professional (full branding per flavor).
Often brands do a hybrid: print common info on all, then have a designated area for variant info which could be pre-printed in smaller runs or with digital. Talk to your supplier – sometimes they can gang-run variants if the only difference is color text, etc.
Mint Print might suggest something like printing a master design, then overprinting variable data digitally if needed. This is especially useful if you have many SKUs but lower quantities of each.
Q14: What about inner packaging or inserts? Does my custom box come with those?
A: Typically, the custom box is just that – the box. Inserts (whether cardboard dividers, foam, molded pulp, etc.) are separate components and need to be specified additionally. Many packaging providers can also produce inserts (especially if it’s cardboard or foam). Make sure to discuss it if you need it. For instance, a box for a mug might need a cardboard insert to hold the mug in place – you’d want that designed alongside the box. Some suppliers might include a basic insert in the quote if they know you need one, but don’t assume. Always specify any interior packaging needs.
Alternatively, you might DIY an insert (using shredded paper, etc., for padding instead of a custom insert) to save cost, but a well-designed insert gives a neater appearance. If you’re including things like product manuals or multiple items in one box, definitely plan how they’ll be arranged or held.
Q15: How can I make my unboxing experience special without driving up cost too much?
A: Great question, because not every business can afford super elaborate packaging. Some budget-friendly touches:
-
Include a thank you note or small card – even if box is plain, a nice insert can delight.
-
Use branded packing tape or stickers – sealing a box with tape that has your logo, or closing tissue paper with a logo sticker inside, adds brand feel cheaply.
-
Print on the inside of the box rather than outside – sometimes you can do one-color inside print saying “Enjoy!” or patterns, which can be a fun surprise (and one-color might not add too much cost if your outside is one-color too, etc.).
-
Unique tissue paper or colored filler – low cost way to add perceived value. Custom tissue with one-color logo repeat is relatively affordable at quantity.
-
Encourage interaction: maybe print a QR code inside that leads to a welcome video or a discount, adding digital dimension to unboxing.
Remember, customers mainly want authenticity. A handwritten thank-you on a card or a small freebie (sticker, coupon) in the package can create wow even if the box itself is simple.
Q16: What if I have leftover boxes after a rebrand or product change?
A: It’s a bit of a pickle to have obsolete boxes. Options:
-
If changes are small (like a logo update), you can over-sticker them to not waste (place a new logo label over the old one).
-
Use them for something else: maybe repurpose for shipping other items, or donate to local businesses if they’re plain enough, as a goodwill gesture.
-
Recycle them – not ideal since it’s sunk cost, but better than landfill.
To avoid this, try not to over-order too far beyond what you’ll use if you anticipate rebranding. Also, neutral designs are safer long-term – if you plan frequent product changes, keep packaging generic and differentiate with labels as needed.
That covers the big FAQs! If you have a question not listed here, feel free to reach out for more personalized advice. Custom packaging has a learning curve, but resources like this FAQ aim to flatten that curve and empower you to make informed decisions.
10. Mini Glossary of Packaging Terms
The packaging world has its own lingo. Here’s a quick glossary of common terms you’ll encounter in custom box discussions, so you can speak the language confidently:
-
Dieline: A flat template for your box layout showing all cut lines, fold lines, and bleed areas. It’s basically the blueprint on which you place your artwork for printing.
-
Flute: The wavy inner layer of corrugated cardboard. Flute types (A, B, C, E, etc.) indicate thickness and number of flutes per foot – e.g., E-flute is quite thin (good for small retail corrugated boxes with finer print surface), C-flute is common for standard shipping cartons.
-
Corrugated vs. Cardboard: Often used interchangeably in casual speak, but technically corrugated refers to the three-layer board with fluted middle, while cardboard could mean any paper-based board (including folding carton stock). So your Amazon box is corrugated cardboard; a cereal box is paperboard (folding carton).
-
Paperboard: Also called folding carton board or chipboard (though chipboard can imply a grayish recycled board). This is the single-layer board for lighter packaging (cosmetic boxes, etc.).
-
Chipboard: A type of paperboard often made from recycled paper, typically gray or brown, used in making rigid boxes or as the backing for notepads etc. In rigid luxury boxes, a thick chipboard is wrapped with nicer paper.
-
SBS: Stands for Solid Bleached Sulfate. It’s a high-quality white paperboard made from virgin fibers (bleached), known for its smooth surface and strength. Common in food, cosmetics packaging where you want crisp white and good printability.
-
Kraft: Refers to paper or board that is unbleached (brown) and made via the kraft process (which gives stronger fibers). Kraft paper, kraft corrugate – both brown and more eco-looking. Also slightly stronger than equivalent white board because the fibers aren’t weakened by bleaching.
-
Scoring: Creating a crease line on the board to help it fold cleanly. Packaging dielines often have score lines (where folds will be). A well-scored line ensures the box folds at the right place without cracking the material.
-
Die Cutting: The process of cutting the box shape out of sheets using a die (like a cookie cutter but for paper/cardboard). A die is a tool made with sharp blades in the pattern of your dieline. Die-cutting allows windows, slots, or unique shapes beyond straight lines.
-
Bleed: In design, bleed is the area beyond the cut line where you extend your background color or image. Typically 1/8 inch (3mm) or so. This ensures when the box is cut, the print goes fully to the edge with no white sliver.
-
CMYK / 4-Color Process: The standard four ink colors (Cyan, Magenta, Yellow, Black) used in full-color printing. These mix to create a spectrum of colors in print.
-
PMS / Pantone: Pantone Matching System – a standardized set of colors (with codes) that printers can use as spot (pre-mixed) inks to ensure exact color matching. Useful for precise brand colors or special hues not easily made from CMYK.
-
Foil Stamp: A decorative application where a thin foil (often metallic) is stamped onto the paper with a heated die, leaving a shiny design. Commonly gold or silver foil for logos or accents.
-
Emboss / Deboss: Embossing raises areas of the paper (from the underside) to create a 3D raised effect. Debossing is the opposite – pressing down into the paper. Adds tactile interest.
-
Spot UV: A gloss coating applied only to specific areas (spots) of a design, cured by ultraviolet light. Often used to make a logo or text shiny on a matte background.
-
Aqueous Coating: A water-based clear coating applied to prints for protection and finish (comes in gloss, satin, etc.). It’s an eco-friendlier standard coating used in most printed packaging to add slight sheen and scuff resistance.
-
Lamination: A process of applying a plastic film over the printed paper for protection and finish. Gloss or matte lamination are common for a premium feel and added thickness/strength.
-
Flute Direction: Corrugated boards have flutes that run in one direction. Flute direction can affect strength and bending (vertical flute orientation gives stacking strength). If you ever hear “flute direction”, it’s about which way the corrugation channels go in your box (usually along the height for vertical strength).
-
ECT / Edge Crush Test: A measure of corrugated cardboard strength – specifically how much force it can withstand on edge (stacking strength). You might see something like “32 ECT” on boxes; that’s a standard for many shipping cartons.
-
BCT / Box Compression Test: The estimated maximum load a box can take in stacking before it collapses. Derives from ECT and box dimensions. If you’re warehousing and stacking boxes high, this is a relevant figure.
-
Slip Sheet / Layer Pad: Sometimes you’ll want flat pieces of corrugate or chipboard used inside shipments (like between layers of products, or as a stiffener in envelopes). Those are usually just called pads or slip sheets.
-
MOQ: As discussed – Minimum Order Quantity. The least number of units you need to order per production run.
-
Turnaround Time: Time it takes to complete an order (often interchangeable with lead time, though sometimes excludes shipping).
-
Fulfillment: In context of packaging, sometimes refers to the process of assembling the boxes with the product. Some packaging companies offer fulfillment services – which means after printing boxes, they pack your products into them and handle distribution. Not common unless they specialize in that.
Armed with these terms, you’ll find it easier to communicate with suppliers and understand any documentation or discussions during your custom packaging project. If a salesperson says “the SBS board with a matte AQ and spot UV on front panel will really make your logo pop”, you now know they mean a high-end white paperboard with matte coating and a shiny UV highlight for the logo.
Feel free to refer back to this glossary anytime you run into jargon. In packaging, as in any industry, clear communication is key – and knowing the lingo definitely helps!
Conclusion & Next Steps: Elevate Your Brand with Custom Packaging
Custom packaging boxes are more than just containers – they are a strategic tool for branding, protection, and customer experience. By now, we’ve covered everything from understanding search intents (what your customers might be looking for) to the nitty-gritty of box materials, design, SEO strategy, and even how to amplify this content’s reach.
If this seems like a lot, remember: you don’t have to implement everything all at once. Use this guide as a reference at each step of your packaging journey:
-
Planning phase: Revisit the search intent (Step 1) and keyword universe (Step 2) to align your packaging content and offerings with what customers seek (both on Google and in product expectations).
-
Design phase: Use the insights on types of boxes (Section 2), materials & finishes (Section 4), and avoid the mistakes (Section 8) to develop a package that’s beautiful, functional, and cost-effective.
-
Supplier selection: Consult the checklist in Section 7 to pick a partner who will execute your vision reliably.
-
Marketing phase: Don’t forget to utilize SEO (Step 6) and post-publish strategies (Step 7, outlined separately below) to ensure that not only do you have great packaging, but also that your content about your packaging (like this very guide) reaches a wide audience, establishing your authority.
At Mint Print Packaging, our goal is to help businesses like yours create packaging that truly adds value. Whether you’re in the UK, India, USA or anywhere globally, the principles remain the same: depth of knowledge, attention to detail, and customer-centric thinking lead to the best results. We hope the comprehensive information provided here positions Mint Print (and by extension, you) as an authority in custom packaging.
Next Steps / Call to Action (Educational Style):
If you’re ready to take your packaging to the next level:
-
Assess Your Needs: Use the above content to list what you require (box type, design elements, quantity, etc.).
-
Browse and Learn More: Check out our supporting articles (when they’re live, as per the cluster in Step 4) on specific topics like sustainable packaging or designing artwork – they’ll give you even more targeted tips.
-
Consult With Experts: Don’t hesitate to reach out to our team at Mint Print Packaging for a free consultation. We can discuss your project specifics, provide quotes, and even brainstorm ideas with you. As emphasized, we pride ourselves on being responsive and helpfulmintprintpackaging.com – whether you’re a startup needing 50 boxes or an established brand rolling out a nationwide product.
-
Request Samples or a Quote: Seeing is believing. If you want to evaluate our quality, request a sample kit or a prototype for your product. Or simply request a quote based on your specs – no obligations. We’ll transparently break down costs and options (no hidden surprises).
By executing on what you’ve learned, you’re not just ordering packaging – you’re investing in an extension of your brand that can pay dividends in customer satisfaction, loyalty, and of course, that wow first impression.
Remember, custom packaging is a journey, and trends and needs evolve. Keep this guide bookmarked as a living resource. We’ll strive to update our content as new insights (or new Google SERP features) emerge, ensuring you always have the most up-to-date advice.
Thank you for reading this extensive guide. Here’s to your success in creating custom packaging boxes that dominate the market in quality and in search rankings! 🎉
(And when those beautifully packaged products start flying off the shelves or garnering unboxing videos, you’ll know the effort was worth it.)